Saturday, August 30, 2014

U.K. Tour | Week One

I'm baaaack! I went to the U.K. for three weeks. Are you jealous? If so, feel free to live vicariously through this three part series on my trip!

I went to England with my school, so we were accompanied by two expert professors. Our group was comprised of about 20 students of different ages and majors. The trip was for credit and focused on the history and literature of England. I saw so many amazing things and learned a lot. I have chosen some of my favorite moments from the first week of the tour to share with you!

The first week was spent in Bath, England. It is such a nice city. It was predominately built in the 18th century, so it lacks the medieval feel you encounter in other parts of England. It was very clean and open. It also, of course, has many points of interest for the Jane Austen lover, which I enjoyed immensely. We had tea at the Pump Rooms (darjeeling, of course) and pretended to be Catherine from Northanger Abbey as we "took the waters." I even found myself taking "a turn about the room" Pride and Prejudice style.

We took a few day trips as well. My favorites were Wales, Stonehenge, Salisbury, and, of course, London. Tintern Abbey in Wales was one of my top three places I visited. It was so gorgeous and full of history. I still can't get over it! Stonehenge was amazing simply because I have learned about it in school, etc. for most of my life. It felt like my whole existence was culminating at that point. Salisbury Cathedral had amazing stain glass windows. They were intricate and beautiful and I loved them. London was perfect. I didn't get a chance to wander like I wanted (next time!!!), but I did see some great things. I loved the British Museum and the National Gallery. We also went on the London Eye and, despite the rain, enjoyed a gorgeous view.


View of Bath from the top of Prior Park Garden.

The River Avon, with the Covered Bridge on the left. 

The Roman Baths

The Royal Crescent

The Pump Rooms. 

Stonehenge.
Stonehenge selfie!
The beautiful English countryside. 

Salisbury Cathedral.

Stained glass at Salisbury.

Devil's Pulpit, where Wordsworth wrote "Lines Composed a Few Miles above Tintern Abbey"

The view of Tintern Abbey from the Devil's Pulpit. 

The ruins of Tintern Abbey in Wales.

Chepstow Castle in Wales.

Buckingham Palace!

Changing of the guard. 

Big Ben and the Houses of Parliament.

The London Eye. 

View of Big Ben from the London Eye. 


 England, you're amazing.


Friday, July 25, 2014

I Tricked Out an Ampersand

Ever since Max and Caroline on 2 Broke Girls bought a giant light-up arrow for their cupcake shop, I've wanted one. The light-up thing, not a cupcake shop.


I'm quite taken with the mildly obnoxious, pseudo vintage, slightly hipster vibe of it. So, I shopped around - and by "around" I mean that I sat in my bed, online browsing until 2 am - and, to my dismay, found nothing satisfying (that I was willing to pay for). Weeks passed, then months, and I was ready to settle for a life without light-up wall decor. But then I went to a Hobby Lobby, a place that EVERY person needs to experience, and found the inspiration to make my own vintagey-hipster, light-up sign!

Things you'll need:
- Tin letter/number/symbol/silhouette of your late guinea pig named Randolf/logo
- Light string(s)
- Drill
- Scrap wood
- Decent forearm strength
- Electrical tape
- Sharpie
- Sewing measuring tape

Tin symbol from Hobby Lobby: $15 (on sale)
Battery powered LED light string from Hobby Lobby: $5ish
(I used three strings of 15 lights)
 Step 1:

Start by flipping over your symbol and measuring the inner circumference. Be sure to include any holes for things like A's, B's, &'s, @'s, etc. as separate measurements.


Calculate how many lights you'll need to outline the symbol. Remember to measure how much cord is between the bulbs on your light string! With a sharpie, mark (on the back side) the spot where each light will poke out.

Step 2:

Use your scrap wood as a stable, disposable surface to drill into. Now, if you are not a drill savvy person, you'll need to acquire a drill savvy person. And - here's a free tip out of the generosity of my soul - while you have said person around, you should take the opportunity to familiarize yourself with a drill. This will add to your skill set and work towards eliminating your need of friends.*

 
Drill Master Dad making this look very easy.
Drill Apprentice Kaite using her decent forearm strength to keep the drill straight and eventually force a hole through the metal.

It is very, very important that you find the right sized drill bit for the light holes. If the holes are too big, the lights won't stay in, too small and they won't poke through. If you aren't sure what size to use, start small and then enlarge as necessary. Once you've found the perfect fit, drill through each sharpie-designated point.


Step 3:

Once you've finished drilling the holes in your symbol, you can start with the lights! Poke the lights through the holes and secure them with electrical tape.


Step 4:

Light 'em up!

              
               In the dark.
Not in the dark.


*Your daily dose of satire.

Sunday, June 22, 2014

Parental Advice from a Well-Raised Teen

I am 18. I do not have children. So, I completely understand if you write this off as a pretentious case of kid-thinks-they-know-better. I'm going to write it anyway.

I'm one of those lucky college kids that has an amazing job: I get to teach kids gymnastics. If you know me, you understand why this is a perfect fit. But while I know my kip drills and level four floor routine like the lyrics of Wicked, what I don't know is kids. More specifically, ill-behaved kids.

Let me start by saying that I have taught a lot of wonderful kiddos and that I love them all regardless of their behavior. That doesn't mean I always have to like them.

1. Teach your children how to apologize.

Yeah, I know, this sounds like a no-brainer. I thought so, too, until one of my kinder gymnasts hit one of his classmates. I told him to say sorry, but he just grunt-screamed at me and then ran to his mom. I went to explain what was going on and to tell the mother that her son would have to sit with her until he was ready to say sorry because we don't hit in my class. She told me, "Oh, he doesn't understand apologizing" and sent him back to class. I was dumbfounded. How can a kid not understand apologizing at the age of five? Teach your children to say they're sorry. And while you're at it, teach them not to hit. Or grunt-scream.

2. You're kids can hear you. And they will mimic you.

I had an especially young little girl in one of my kinder classes. She was only three and a half. Really, she was too young and should have been in the parent-tot class, but her parents (accidentally, I think) signed her up for Kinder 1. She had a rather developed attitude problem for such a young age. Completely adorable, but horribly sassy. There was a time she decided that she'd like to climb on the high beam. I told her she couldn't do that because she might fall off and get hurt. I pulled her off and started to tell her what we were doing, but I didn't get to finish because I was interrupted by, "I don't want to hear you talking anymore." I was surprised, but had a little more experience by then and didn't miss a beat with my response of "Well, I'm sorry, but I'm the teacher and you're going to have to listen to me." So the kid crosses her arms and starts marching away. "Where are you going?" I asked. And here's the kicker: "I don't want to see your face anymore." Oh, excuse me? One rude exclamation of desire - fine. But two? Oh, no. Now, where do you think she came up with these things? I have no proof, but I'd say she's quoting Mom or Dad. So, keep in mind - what you say, they will say. And who knows who they'll say it to. It could be an appalled teen blogger, or it could be your boss.

3. Have rules.

And follow through with them. The most challenging student I had over the course of the year was a little boy with lots of affection and no discipline. He gave me hugs and brought me flowers, but he routinely told me he wanted a different teacher. Color me confused. I learned that this kid likes to play games. Games like Catch Me if You Can (while I run through the cross-tumblers), How Many Classmates can I Make Cry, and, his favorite, How Far can I Push Teacher Before She Explodes. In case you were wondering, he never got the answer to that last one. But, oh Lord, did he try. In our first class, after the first instruction I gave, he let me know that he doesn't have rules at home. Really. And I quote: "My mom says I can do whatever I want." I told him that I'm not his mom, I'm his coach. But the fact is, I'm not his mom, I'm his coach, so even though I got him to behave decently for me by the end of the quarter, the discipline he got from me will wash off in his next bath if it isn't reinforced at home. Now, I know that he could have been lying about what his mom told him, but with his behavior as evidence, I believe it.


These stories are just a few of what could be a mildly entertaining coffee table book. I'd love to tell them all, if only because I need to know that I'm not the only person whose soul dies a little when I meet kids in such need of discipline, in need of parenting. I know I'm making big accusations here and I also know that I'm very biased when I say that I make those accusations based on the fact that my parents taught me so much better. But then, I don't think my bias makes me any less right. Again, though, probably biased; it's a vicious cycle. I guess my reasoning is this: I would never have even considered speaking to my teacher - or any big person - the way I've been spoken to by some of my students. And I stood in line when I was told to do so, just like I said sorry when I hurt someone's feelings. And I never hit anyone because I was told not to hit. I bit my brother once when I was four... That didn't end well for me. Because I was punished. Because I was a child and my parents had to teach me discipline. Because that's how kids learn to be decent human beings.

All this to say: Parents, parent*.


*This is a verb. I thought I should clarify in case of confusion.

Friday, May 9, 2014

White Interiors

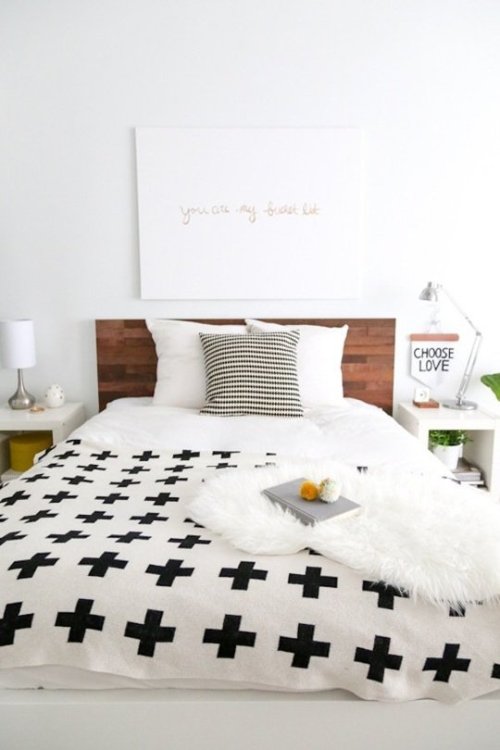
I am loving stark white interiors lately. White walls, white floors, white furniture. White everything. I am attracted to how clean and airy it looks. It has a calming effect on me. Here are some of my favorite interiors:


Oh. My. Goodness. So clean and crisp. I would love to wake up in this bed every morning. Any color in this room really pops. I love the use of texture -- the wood headboard (which, btw, you can make yourself here), the quilt, the furry throw. 


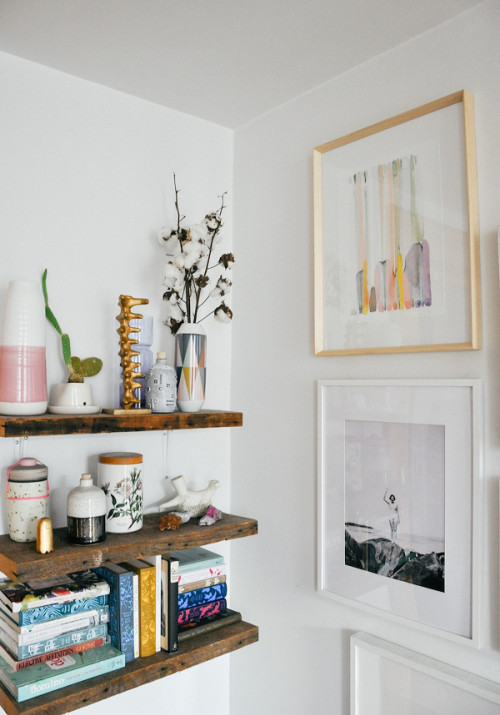
Even though this little corner is cluttered, it feels clean and fresh. 


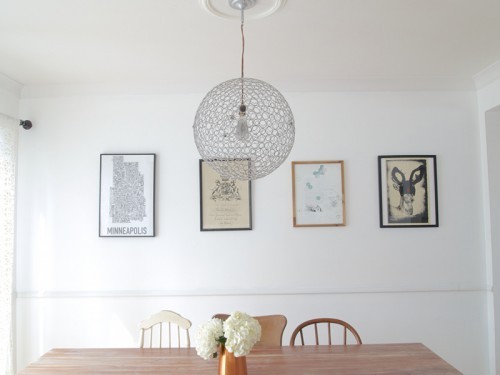
This room feels very open. I love how mismatched it is -- different chairs and different sized pictures. It's so individual. This dining area definitely has a personality. 


Another perfect dining room. The chairs are to die for. Both styles are some of my favorites. I love the contrast of the super modern Eames chair remake with the more traditional looking wishbone chairs. The sideboard almost disappears into the wall, but it has a sheen which reflects back into the room. The black pendant draws focus to the table. 


I love the huge pop of color the chairs bring. The room is still so white and airy, but the chairs add some quirk. The table is amazing. The great thing about a white interior is that you can get away with more chunky furniture without weighing down the room. And, I can't not mention the chandelier. How amazing is the geometric frame?


This kitchen has a more rustic feel than some of the other rooms. The brick adds so much dimension and texture. The many uses of greenery make the room so approachable. I love the barstools. I'm a sucker for a pop of yellow. Also, they're similar to the iconic Tolix chairs that I love. 


While a little darker, this kitchen is based in white. The black adds dimension, the tile backsplash adds texture, and the bronze pendant adds some glam. The Lucite chairs and stainless steel table keep the room fresh and light. 


Thursday, May 8, 2014

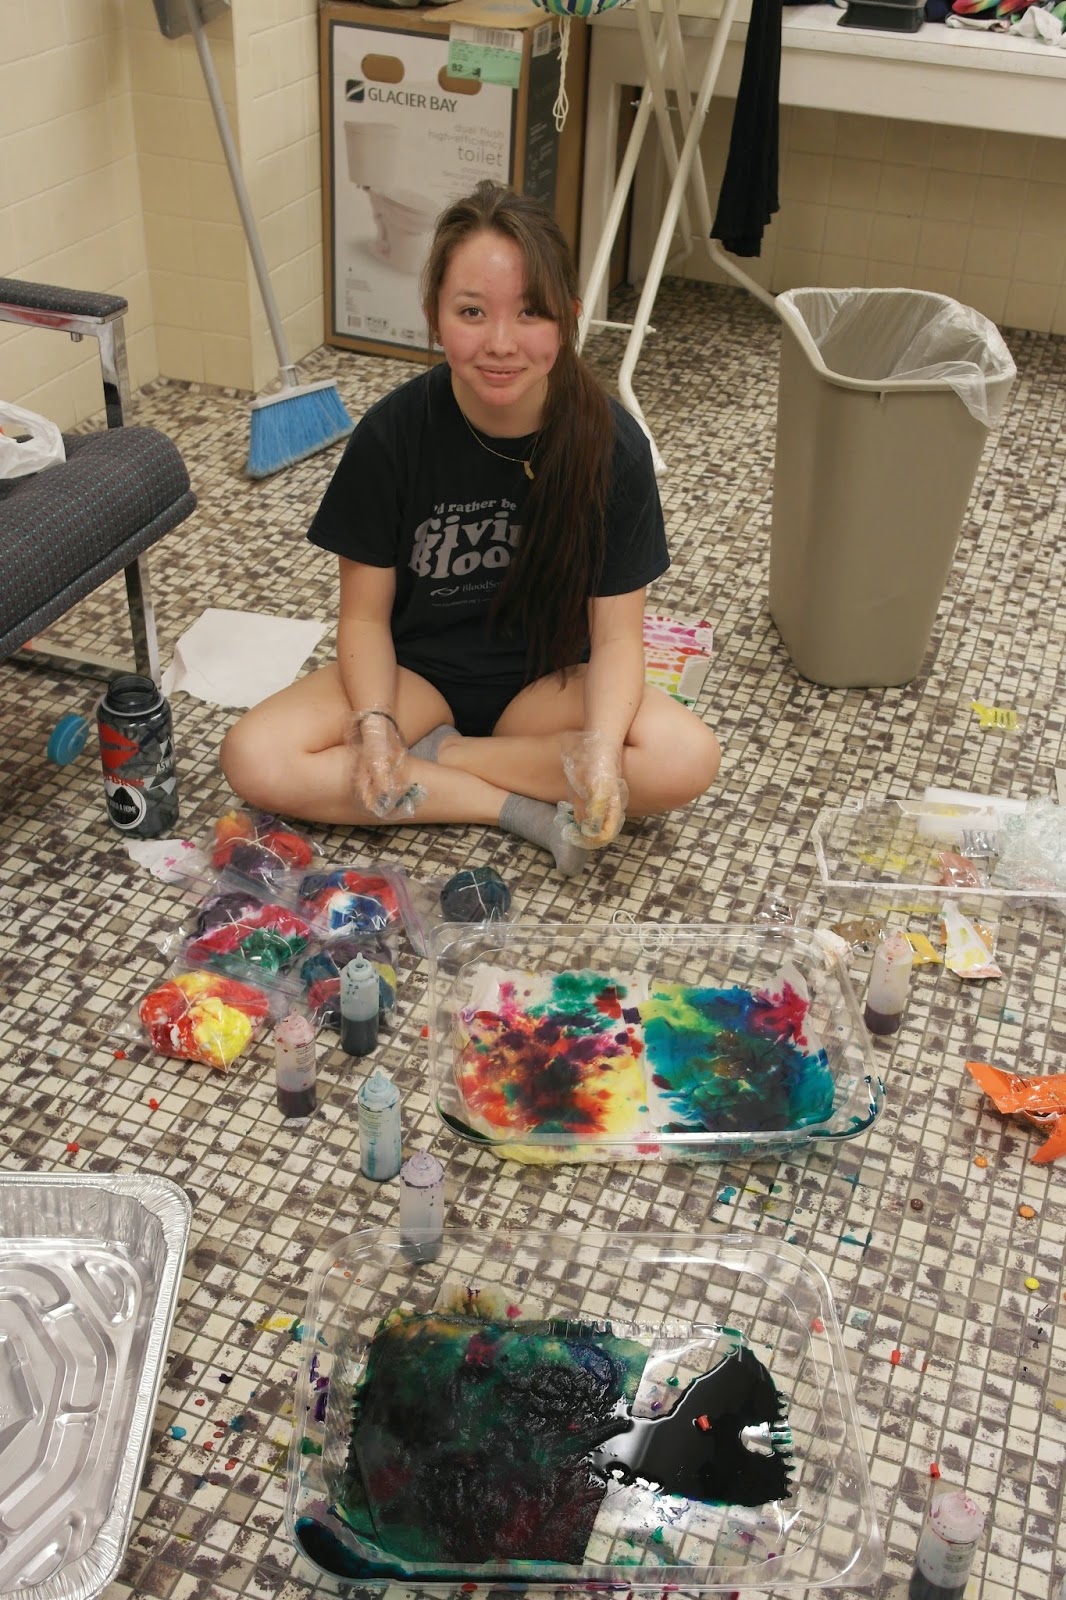
Staining My Clothes

Go to college and start becoming a grown up. That was the idea. And yet, I find myself suddenly rediscovering my childhood pleasures: Disney movies, coloring books, juice pouches, and TIE-DYE.

Before starting college, I hadn't tie-dyed anything in around ten years. And I probably would've continued that way except that I got a job where I have to wear either white or tie-dye and I got an RA with an enthusiastic passion for the stuff.
See, nice clean trays!
We're so neat and prepared!

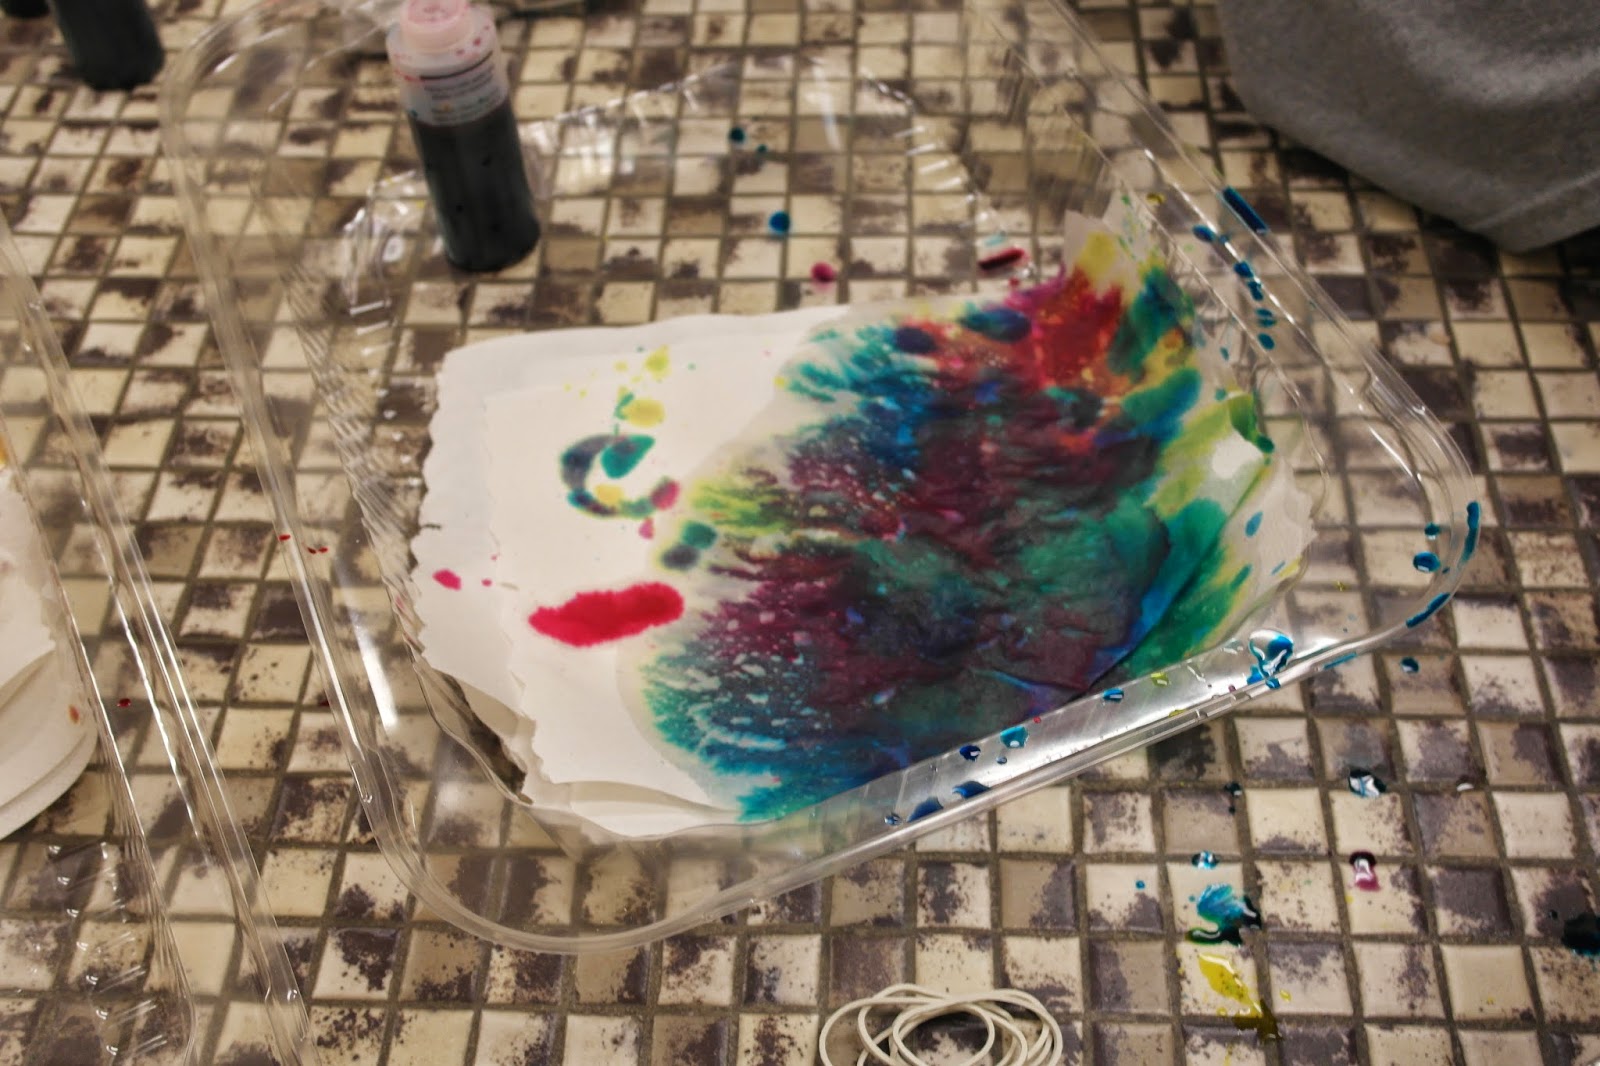
Last week, a couple of my friends and I spent Friday night making a mess in the laundry room. I mean, we used trays and had paper towels handy - we had every intent of being perfectly neat. But see, we're not pros at this and we laugh a lot so we jerk a lot. So, yeah, we spill a lot
too. 
Colors fly!
Then it begins.

But despite the incredible amount of dye all over the floor and all over ourselves, we had a blast. It's exciting, not really knowing how your project is going to turn out.

I haven't enjoyed myself so much in a long time. Between classes, essays, work, and sleep, there's not a lot of time left for fun. But I also realize that I should make time. Right after sticking her hands wet-concrete style into the tray of spilled dye, one of my friends says, "My parents would be so proud of me for doing something fun!" If that's not a sign that we need to live a little, then you need to get your eyes checked because that's a sign.

 Okay, so everything from my nails to my elbows will be spotted with dye for the next few days, but there is actually not a single reason for me to care. There's just something so freeing about deliberately staining my clothes.

Note the horrible color combo in my tray... Results to come.

We really did make a mess...

Just a few of the finished products!

This is what happens when your fuchsia mixes with your yellow...
Brown. Gross, stupid brown.


Wednesday, May 7, 2014

Bright Floral Letter

I recently embarked on a total room makeover. For a long time I have wanted a large letter "M" (for Madison, of course) incorporated into my decor. I think they are so classy and are a great way to portray your style. So, I decided to couple that desire with my love for Lana Del Rey and the flower crown. The product is a super bright and springy floral M that is a new focal point in my space.

I found the tutorial for this project over at The Sassy Life. Kaite and I created the masterpiece last Saturday afternoon when we were feelin' crafty. We changed very little from the original tutorial, except the material for the letter. We couldn't find a paper maché letter anywhere in town, so we made our own out of two pieces of foam board (This isn't advisable if you can find a pre-made letter. Ours was difficult to cut out.). I also added some ribbon around the edges, since they were not smooth.


I bought a lot of faux flowers. A lot. 


The next thing we had to do, of course, was take a bunch of photos of ourselves with the flowers. We had to get our money's worth, right?
  
Kaite's beautiful letter design.

So many flowers! Designing the layout was the best part.

Finished product. So cute!

Placed it on my desk. A cute backdrop for when I'm studying!

I think this project turned out pretty well! It looks so good! The best part is, it wasn't too difficult. It took us a good 3 hours, but the results are amazing and totally worth it. The whole project was under $50. That's still a pretty steep price, but fake flowers are expensive! I love having something that looks so bright and alive. Even though the flowers are fake, it's like bringing the beautiful outdoors inside. The best part is, the flowers will last year round! I have fallen in love with this project.